


TEAM SAP Vista
Typically replies in a few hours
Customer Care Team
Hi there
How can i help you today?
How can i help you today?

Start Whatsapp Chat
Are you a developer seeking to enhance your SAP ABAP development experience? Imagine having the power of Visual Studio at your fingertips, seamlessly integrated with SAP systems. In this blog post, we'll explore how you can connect SAP ABAP in Visual Studio, unlocking a world of possibilities for efficient coding, debugging, and collaboration.
Pre-requirements:
How to Connect SAP ABAP in Visual Studio:
Configuring Your SAP System:
a. To connect to your SAP system, enable the ABAP Development Tools (ADT) ICF node. This is the same service that tools such as SAP Hana Studio use.
b. Open your SAP GUI, connect to the target system, run the transaction SICF, and then activate the ADT_SRV in the service name as shown below.
c. Right-click on the adt_srv and check for Activation; if the option is disabled, then it is in activation mode.
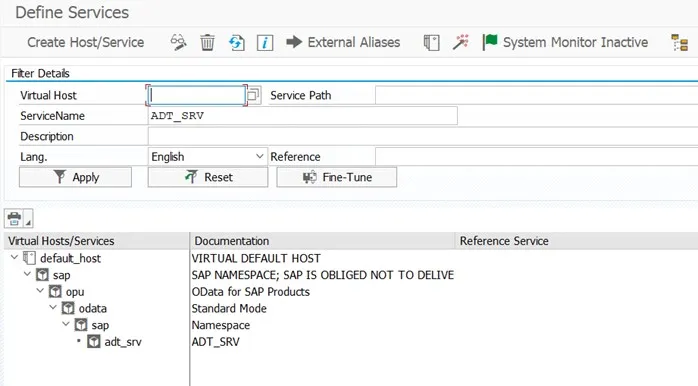
d. Right-click on the adt_srv and click Test Service; you will be redirected to a webpage. Copy the URL up to the port number.
Configuring VS Code:
a. After installing Visual Studio IDE, install the required plugin, i.e., ABAP remote filesystem. Click on Install.

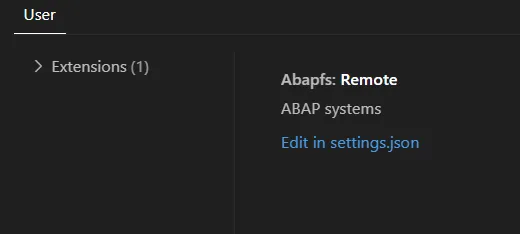
b. After plugin installation is complete, click on the Gear icon -> Extension Settings of the plugin.

c. Now click on Edit in Settings.json.
d. Replace the code with the below code with your credentials:
{
"editor.formatOnSave": true,
"[json]": {
"editor.defaultFormatter": "esbenp.prettier-vscode"
},
"workbench.editorAssociations": {
"*.ipynb": "jupyter.notebook.ipynb"
},
"abapfs.remote": {
"SAP System Label": {
"url": "URL", // Add URL copied from the webpage
"username": "USERNAME", // Add username
"password": "PASSWORD", // Add password
"client": "110",
"language": "EN",
"allowSelfSigned": true
}
},
"[jsonc]": {
"editor.defaultFormatter": "esbenp.prettier-vscode"
},
"security.workspace.trust.untrustedFiles": "open"
}
e. Save the file and press the F1 key, then select "ABAPFs Connect to a SAP System." You will now find the file structure, and you can do ABAP coding in Visual Studio.


16192 Coastal Highway,
Lewes, DE 19958
Call us : +1 302-514-1166

Call us : +91-9059811078

.webp)

.webp)

